How to Make Butterfinger Balls: Easy Step-by-Step Guide
Butterfinger Balls are the perfect combination of simplicity and indulgence. These no-bake treats blend creamy peanut butter, crunchy Butterfinger candy bars, and rich chocolate for a dessert that’s as fun to make as it is to eat. Whether you’re preparing snacks for a party, putting together homemade gifts, or simply craving something sweet to enjoy with your family, this recipe is the ideal solution. With just a few simple ingredients and minimal effort, you’ll create a treat that’s sure to delight everyone.
This guide will walk you through everything you need to know to make Butterfinger Balls, from understanding what makes them unique to step-by-step instructions, tips, variations, and storage solutions. By the end, you’ll be ready to whip up a batch of these mouthwatering confections like a pro. Let’s dive into the details to get started!
Understanding Butterfinger Balls
What Are Butterfinger Balls?
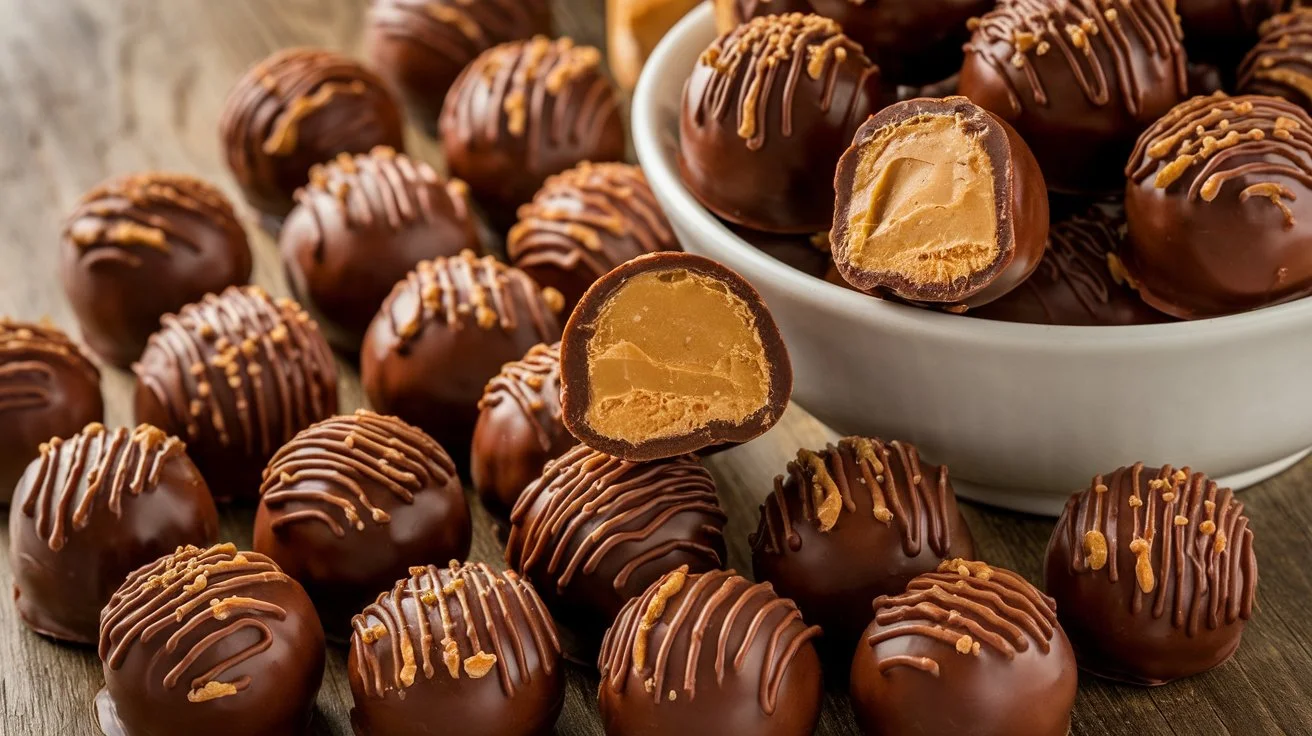
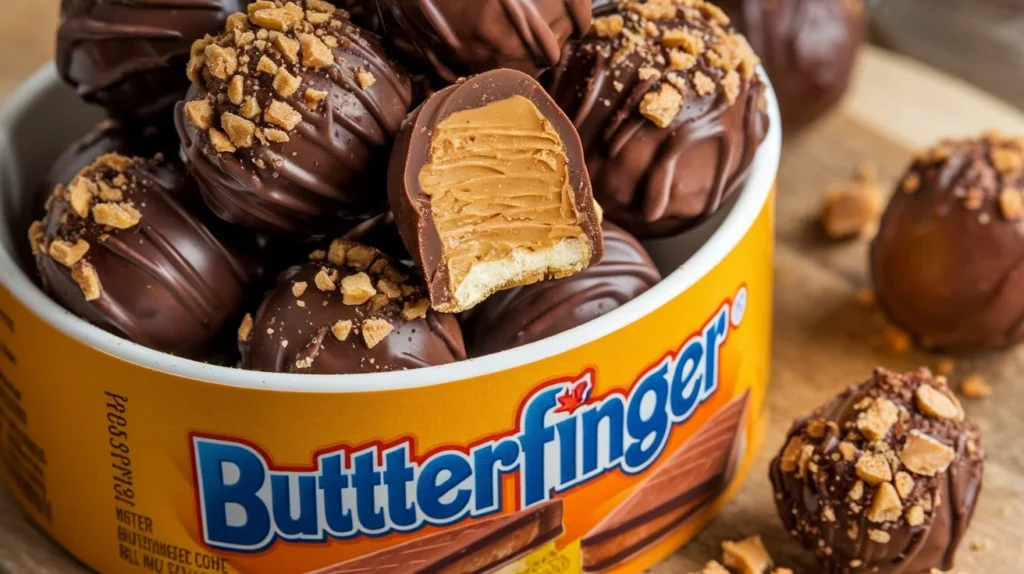
Butterfinger Balls are bite-sized, no-bake confections that take the classic Butterfinger candy bar and elevate it into a homemade dessert. They’re made by blending crushed Butterfinger candy bars with a creamy base, often including peanut butter, powdered sugar, and graham cracker crumbs. The mixture is shaped into small balls, coated in chocolate, and optionally garnished with sprinkles, sea salt, or extra candy crumbs for a decorative touch.
These treats offer a rich, satisfying flavor profile. The creamy peanut butter base perfectly complements the signature crispiness of the Butterfinger pieces, while the chocolate coating adds an irresistible finishing touch. Each bite is a perfect mix of smooth, crunchy, and sweet.
Why Are They So Popular?
The popularity of Butterfinger Balls can be attributed to several factors: simplicity, flavor, and nostalgia. First and foremost, they’re incredibly easy to make. There’s no need for baking, which means anyone can prepare them, even those who don’t consider themselves skilled bakers.
Next, the flavor is unforgettable. Fans of Butterfinger candy bars will love how these treats capture that signature taste in a new and exciting form. Plus, the addition of peanut butter enhances the overall richness, making them utterly addictive.
Finally, Butterfinger Balls evoke a sense of nostalgia. Many people associate Butterfinger candy with childhood memories, and turning it into a homemade dessert brings those memories full circle in the best way.
What Makes Them Unique?
Butterfinger Balls stand out from other no-bake desserts thanks to their distinct texture and flavor combination. While many no-bake treats rely on a simple mixture of graham crackers and sweetened ingredients, these add the crunch and flavor of crushed Butterfinger candy bars, making them truly one-of-a-kind.
The chocolate coating also elevates the dessert, creating a polished, professional appearance that belies how easy they are to make. You can customize the presentation to match any occasion, whether it’s a holiday, birthday, or casual gathering.
A Versatile Treat for All Occasions
One of the best things about Butterfinger Balls is their versatility. They’re perfect for all kinds of occasions, from formal events to laid-back get-togethers. Whether you’re serving them at a holiday party, offering them as a thoughtful homemade gift, or simply keeping a batch on hand for when cravings strike, these treats fit the bill.
Beyond their practicality, Butterfinger Balls can be easily adapted to suit your preferences. Want a pop of color? Add sprinkles. Prefer a more elegant look? Drizzle the chocolate coating with white chocolate or top them with edible gold flakes. Need a nut-free version? Swap the peanut butter for sunflower seed butter. The possibilities are endless!
What You’ll Need to Get Started
Before you dive into making Butterfinger Balls, it’s important to gather all the necessary ingredients and tools. Preparation is key to ensuring the process goes smoothly and that the final result is as delicious as possible.
In the next section, we’ll explore the specific ingredients you’ll need, from the basics like peanut butter and chocolate to optional extras for customization. We’ll also cover the equipment required to make the process efficient and mess-free. So, let’s get everything ready for your Butterfinger Ball adventure!
Ingredients and Equipment for Making Butterfinger Balls
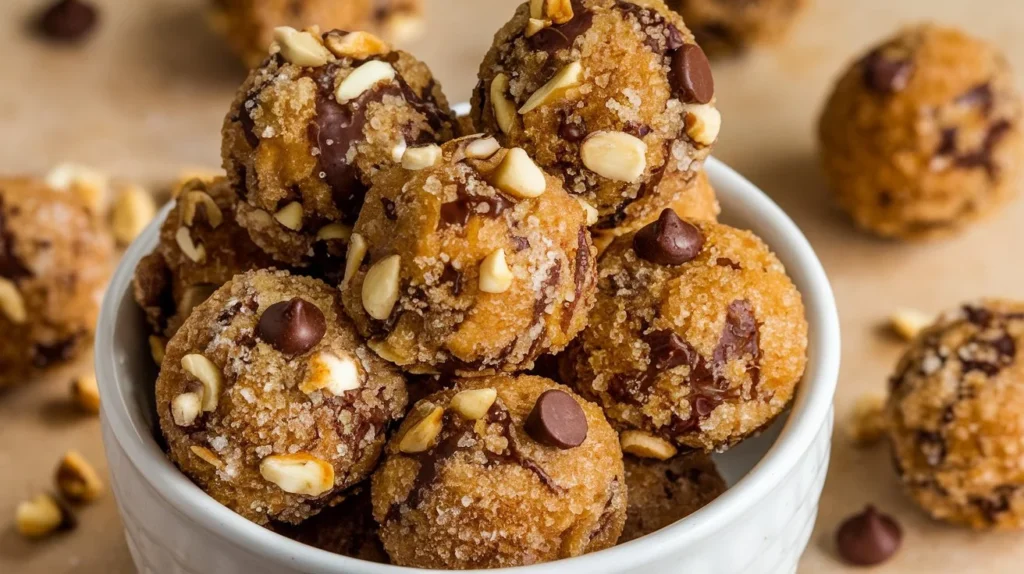
Essential Ingredients for Butterfinger Balls
To make Butterfinger Balls truly spectacular, you’ll need a few staple ingredients that come together seamlessly to create the perfect treat. Here’s a breakdown of what you’ll need:
- Creamy Peanut Butter: This serves as the foundation of your mixture, delivering a smooth and rich texture. Opt for regular peanut butter rather than natural varieties to avoid excess oil.
- Unsalted Butter: It adds creaminess and helps bind the ingredients, ensuring the mixture holds its shape when rolled into balls.
- Vanilla Extract: A small amount goes a long way in enhancing the flavor and aroma of the dessert.
- Powdered Sugar: This sweetens the mixture while helping to achieve the perfect consistency for shaping the balls.
- Graham Cracker Crumbs: These add texture and a slightly nutty flavor, providing structure to the base.
- Crushed Butterfinger Candy Bars: The star ingredient that gives the balls their signature crunch and the iconic Butterfinger taste.
- Chocolate Bark or Chips: Melted chocolate creates the smooth, decadent coating that makes these treats irresistible. Choose milk, dark, or white chocolate based on your preference.
Optional Ingredients for Making Butterfinger Balls
For an added twist or decorative flair, consider incorporating some of these optional ingredients:
- Coconut Oil: Mixing a teaspoon of coconut oil into the melted chocolate results in a shinier and smoother coating.
- Sprinkles or Sea Salt: Garnish the chocolate coating with sprinkles for color or a pinch of sea salt for a sweet-and-salty contrast.
Necessary Equipment for Making Butterfinger Balls
Having the right tools on hand makes preparation effortless and ensures your Butterfinger Balls look as professional as they taste. Here’s what you’ll need:
- Mixing Bowls: Multiple bowls for combining and holding ingredients. Use a large one for the base mixture.
- Electric Mixer: This helps achieve a smooth, evenly mixed dough without the strain of manual stirring.
- Baking Sheet: Use a baking sheet lined with parchment paper to hold the rolled balls before and after coating.
- Parchment Paper: Prevents sticking and makes cleanup a breeze.
- Microwave-Safe Bowl: Ideal for melting chocolate in short intervals without burning it.
- Fork or Dipping Tool: A fork or specialized dipping tool allows you to coat the balls in melted chocolate smoothly and evenly.
With your ingredients and equipment ready, it’s time to roll up your sleeves and dive into the fun part: crafting the perfect Butterfinger Balls! In the next section, we’ll break down the step-by-step process to make these treats come to life.
Step-by-Step Preparation for Butterfinger Balls
1. Preparing the Mixture for Butterfinger Balls
The first step in creating Butterfinger Balls is preparing a creamy, flavorful base. Here’s how to do it:
- In a large mixing bowl, combine the softened butter and creamy peanut butter. Use an electric mixer to blend them until smooth and well incorporated. This creates a rich, creamy base for the balls.
- Add the vanilla extract to the mixture and mix thoroughly. This simple addition enhances the flavor without overpowering the other ingredients.
- Gradually add powdered sugar and graham cracker crumbs to the bowl. Mix on low speed to avoid a mess, and ensure the ingredients are fully combined into a dough-like consistency.
- Gently fold in the crushed Butterfinger candy bars using a spatula. This ensures the signature crunch is evenly distributed throughout the mixture. Be careful not to overmix, as you want to preserve the texture of the candy.
2. Shaping the Balls for Butterfinger Balls
Once your mixture is ready, it’s time to shape the balls:
- Line a baking sheet with parchment paper to prevent sticking and make cleanup easier.
- Using a tablespoon or a cookie scoop, portion out the mixture into even-sized balls, about 1 inch in diameter.
- Roll each portion between your palms to create smooth, round shapes. Place them on the prepared baking sheet, leaving a little space between each ball to prevent them from sticking together.
3. Chilling the Balls for Butterfinger Balls
Chilling is an essential step to ensure the balls hold their shape during the chocolate coating process:
- Transfer the baking sheet with the shaped balls to the freezer.
- Let the balls chill for approximately 30 minutes, or until they’re firm to the touch. This helps them stay intact when dipped in melted chocolate.
4. Melting the Chocolate for Butterfinger Balls
The chocolate coating adds a luxurious finish to the Butterfinger Balls. Here’s how to melt the chocolate properly:
- Place the chocolate bark or chips in a microwave-safe bowl. Heat in 20–30 second intervals, stirring thoroughly after each interval. This prevents overheating and ensures the chocolate melts evenly.
- For a smoother and shinier coating, add a teaspoon of coconut oil to the melted chocolate and stir until fully combined. This step is optional but highly recommended for a polished look.
5. Coating the Balls for Butterfinger Balls
Dipping the chilled balls into melted chocolate is where the magic happens:
- Remove the balls from the freezer. Working one at a time, use a fork or dipping tool to submerge each ball into the melted chocolate.
- Roll the ball gently in the chocolate to coat it completely, then lift it out, allowing the excess chocolate to drip off.
- Place the coated ball back onto the parchment-lined baking sheet. Repeat with the remaining balls.
6. Adding Garnishes to Butterfinger Balls
Make your Butterfinger Balls even more appealing with a touch of decoration:
- While the chocolate is still wet, sprinkle crushed Butterfinger pieces, colorful sprinkles, or a pinch of sea salt on top of each ball.
- This step not only adds visual appeal but also enhances the flavor with added crunch or contrast.
7. Setting the Coating on Butterfinger Balls
Finally, allow the chocolate coating to set completely:
- Let the coated balls sit at room temperature until the chocolate hardens. This typically takes about 30 minutes.
- If you’re short on time, refrigerate the balls for around 15 minutes to speed up the setting process.
Now that your Butterfinger Balls are fully prepared, they’re ready to be served or stored for later. Whether you enjoy them immediately or save them for a special occasion, they’re sure to impress with their delightful flavor and texture!
Tips, Variations, and Storage
Expert Tips for Perfect Butterfinger Balls
Making Butterfinger Balls isn’t just about following the recipe—it’s also about using techniques that elevate the results. Here are some expert tips to help you craft perfect treats:
- Softening Ingredients: Ensure the butter and peanut butter are at room temperature before starting. This makes mixing much easier and results in a smooth, cohesive dough.
- Crushing Candy Bars: For even pieces, place Butterfinger bars in a sealed plastic bag and crush them with a rolling pin. Avoid over-crushing, as you want to maintain some texture for added crunch.
- Avoiding Cracks in Coating: If the chocolate coating cracks, it’s often because the balls were too cold. Allow them to sit at room temperature for a few minutes before dipping.
Flavor Variations
One of the best things about Butterfinger Balls is how easily you can customize them to suit your tastes. Here are a few ideas to get creative:
- Alternative Coatings: Replace milk chocolate with white or dark chocolate for a different flavor profile. You could even drizzle one type of chocolate over another for a decorative finish.
- Nut-Free Option: For those with nut allergies, swap peanut butter for sunflower seed butter or another nut-free alternative. The taste will differ slightly but still be delicious.
- Additional Mix-Ins: Stir in mini chocolate chips, chopped nuts, or even dried fruit to add more texture and flavor to the filling.
Serving Suggestions
Butterfinger Balls aren’t just delicious—they’re versatile, too!
- Dessert Platters: Serve alongside other no-bake treats, cookies, or brownies for an eye-catching dessert spread at parties.
- Gift Packaging: Place the balls in decorative boxes or cellophane bags tied with a ribbon. They make perfect homemade gifts for holidays, birthdays, or “just because” moments.
Storage Instructions
To keep your Butterfinger Balls fresh and delicious, follow these storage tips:
- Refrigeration: Store the balls in an airtight container in the refrigerator for up to one week. Keep them chilled to preserve their texture and flavor.
- Freezing: For longer storage, arrange the balls in a single layer on a baking sheet and freeze them. Once solid, transfer them to a freezer-safe container or bag. They’ll stay fresh for up to two months. Simply thaw in the fridge or at room temperature before serving.
FAQs
1. Can I use natural peanut butter for this recipe?
It’s better to use regular creamy peanut butter. Natural varieties tend to separate, which can make the mixture oily and difficult to shape.
2. How do I prevent the chocolate from seizing when melting?
Make sure your utensils and the bowl are completely dry. Even a tiny bit of water can cause chocolate to seize, turning it lumpy and grainy.
3. Can I make Butterfinger Balls ahead of time?
Absolutely! They store well in both the refrigerator and freezer, making them a great option for prepping ahead of events.
4. What if I can’t find Butterfinger candy bars?
No problem! Substitute with similar candy bars like Clark Bars or 5th Avenue Bars. Peanut brittle is another creative alternative that works beautifully.
5. How do I keep the chocolate coating from cracking?
If the coating cracks after setting, it’s often because the balls were too cold before dipping. Let them warm up slightly before coating them in chocolate.
6. Can I use white chocolate for coating?
Yes! White chocolate not only adds a unique flavor but also creates a visually stunning appearance. Top it with colorful sprinkles for extra flair.
Conclusion
Butterfinger Balls are the ultimate treat for anyone looking for a simple yet decadent dessert. Their no-bake preparation, rich peanut butter base, and chocolate coating make them a favorite for all occasions. Whether you’re hosting a party, creating edible gifts, or satisfying a personal craving, these bite-sized delights are a perfect choice.
Feel free to experiment with different coatings, garnishes, and mix-ins to make the recipe your own. Just be sure to store them properly to enjoy their freshness later. With this guide, you’re all set to impress your family and friends with your homemade Butterfinger Balls!
Have you tried making Butterfinger Balls? Share your thoughts and creative variations in the comments below. We’d love to hear your ideas!

