How Do You Make Butterfinger Balls
Butterfinger Balls are a delicious no-bake dessert combining creamy peanut butter, crushed Butterfinger candy bars, and a smooth chocolate coating. This guide will walk you through the entire process, from gathering ingredients to storing your finished treats. Whether you’re preparing a festive holiday platter or craving a sweet snack, this easy-to-follow recipe will ensure perfect results every time.
Introduction to Butterfinger Balls
What Are Butterfinger Balls?
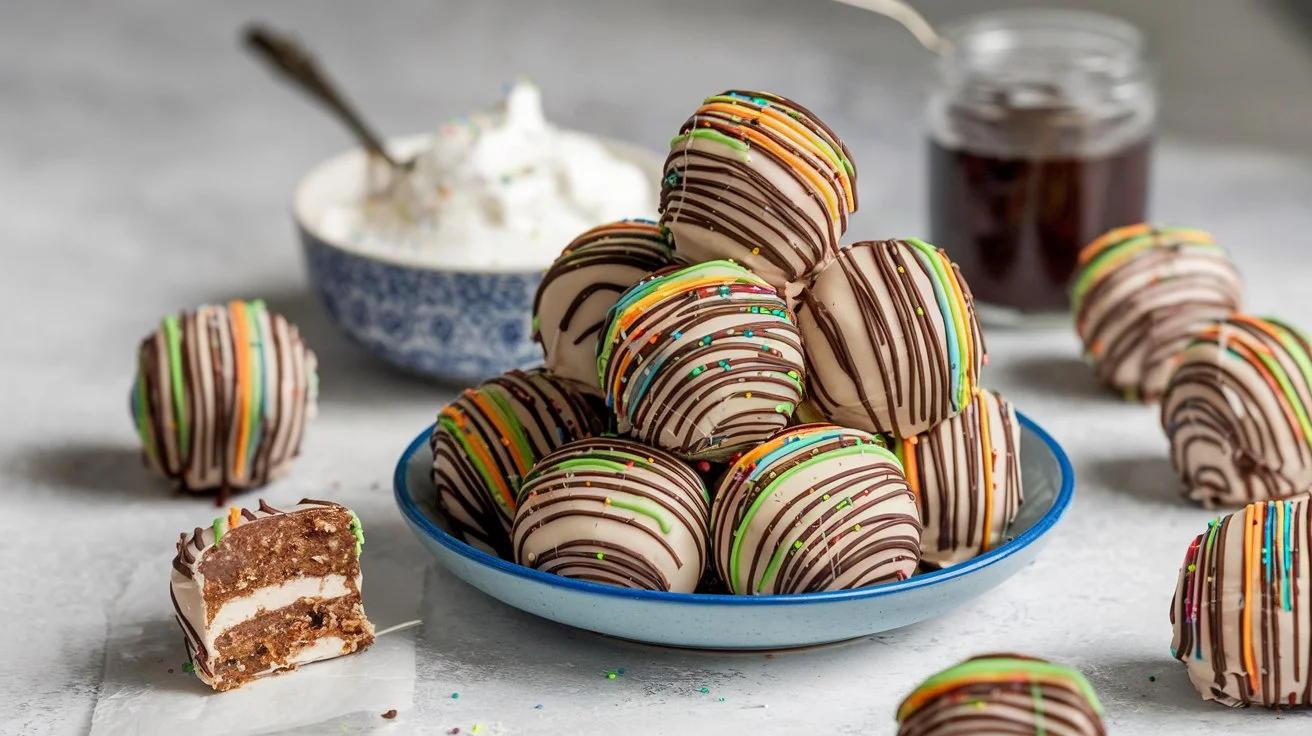
Butterfinger Balls are bite-sized confections made with peanut butter, crushed Butterfinger bars, and a chocolate shell. They’re simple to prepare and require no baking, making them ideal for quick treats or festive gifts. The combination of chocolaty, crunchy Butterfinger pieces with smooth peanut butter creates a mouthwatering contrast of textures and flavors.
These no-bake delights have become a staple at parties, especially during holidays. Their rich, candy-bar flavor and effortless preparation make them a go-to dessert for all ages.
History and Popularity of Butterfinger Balls
Though the exact origin is unclear, Butterfinger Balls have gained immense popularity due to their nostalgic candy bar taste and simplicity. Home bakers often include them in holiday dessert platters alongside truffles, buckeyes, and other peanut butter-based treats.
The popularity of no-bake desserts has surged, as they require minimal effort while still delivering a professional appearance and rich flavor. Plus, Butterfinger Balls are highly customizable, letting you add unique garnishes or swap ingredients while keeping their signature taste.
In the next section, we’ll break down the essential ingredients and tools you need to prepare Butterfinger Balls. Stay tuned for some delicious creativity!
Ingredients and Equipment
Essential Ingredients for Butterfinger Balls
To make perfect Butterfinger Balls, you’ll need a handful of simple ingredients that balance creamy, crunchy, and chocolaty textures:
- Creamy Peanut Butter: Provides a smooth, rich base that binds the mixture together. Stick to regular peanut butter rather than natural varieties for the best texture.
- Unsalted Butter: Softened butter adds creaminess and helps hold the mixture together.
- Powdered Sugar: Sweetens the balls while stabilizing the dough, making it easier to shape.
- Graham Cracker Crumbs: These fine crumbs introduce a subtle crunch while helping create a sturdy dough.
- Crushed Butterfinger Candy Bars: The star ingredient, adding the signature Butterfinger crunch and caramelized peanut butter flavor.
- Chocolate Bark or Chocolate Chips: Used for coating the balls, giving a smooth, rich chocolate shell that contrasts beautifully with the filling.
These simple ingredients, when combined, create a decadent treat that’s both visually appealing and packed with flavor.
Optional Add-ins and Variations
Want to take your Butterfinger Balls to the next level? Try incorporating these delicious variations:
- Vanilla Extract: A splash adds depth and enhances the overall sweetness.
- Coconut Oil: Mix with melted chocolate for a glossier, smoother coating.
- Decorative Sprinkles or Sea Salt: Perfect for garnishing while the chocolate sets, adding extra crunch and visual appeal.
Feel free to experiment by swapping graham cracker crumbs for crushed pretzels or digestive biscuits for a saltier twist.
Necessary Kitchen Equipment
Before you begin, gather the following tools for a seamless experience:
- Mixing Bowls: Use a large bowl for combining the peanut butter mixture.
- Electric Mixer: Speeds up the mixing process and ensures a smooth, even dough.
- Measuring Cups and Spoons: For precise ingredient portions.
- Baking Sheet with Parchment Paper: Prevents sticking and makes cleanup easier.
- Microwave-Safe Bowl or Double Boiler: For melting chocolate coating evenly.
- Fork or Dipping Tool: Ideal for dipping the balls into melted chocolate without mess.
Ingredients and Equipment for How Do You Make Butterfinger Balls
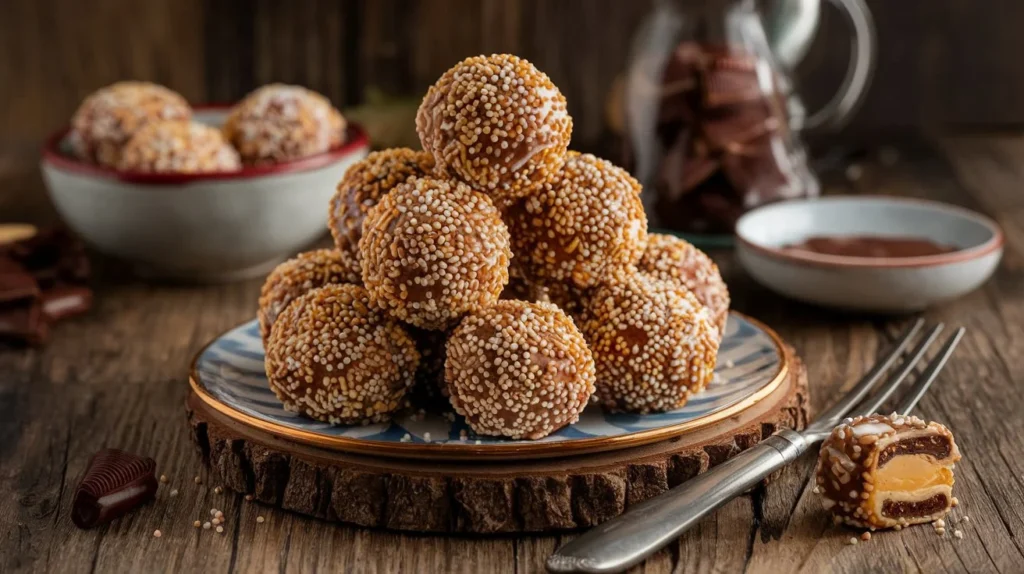
Essential Ingredients for How Do You Make Butterfinger Balls
To create perfect Butterfinger Balls, you’ll need a few basic ingredients that deliver the ideal balance of creamy, crunchy, and chocolaty goodness:
- Creamy Peanut Butter: The base ingredient that binds the mixture together, providing a smooth and rich texture. Avoid natural peanut butter, as the oil separation can affect consistency.
- Unsalted Butter: Softened butter adds creaminess and helps the dough hold together.
- Powdered Sugar: Sweetens and stabilizes the filling, ensuring a smooth, workable dough.
- Graham Cracker Crumbs: Introduces a light crunch while giving structure to the mixture. If unavailable, digestive biscuits or vanilla wafer crumbs can be substituted.
- Crushed Butterfinger Candy Bars: The star ingredient that delivers the signature Butterfinger crunch and caramelized peanut butter flavor.
- Chocolate Bark or Chocolate Chips: Used for coating the balls, creating a rich, smooth chocolate shell.
Optional Add-ins and Variations for How Do You Make Butterfinger Balls
Want to personalize your Butterfinger Balls even further? Try these creative add-ins and substitutions:
- Vanilla Extract: Enhances the sweetness with a warm, aromatic touch.
- Coconut Oil: Stir into the melted chocolate for a shinier finish and a smoother coating.
- Decorative Sprinkles: Add a festive touch by using colorful sprinkles for themed events.
- Sea Salt: Sprinkle a pinch on top of the chocolate coating for a balanced sweet-salty contrast.
- White Chocolate Coating: Swap the standard chocolate with white chocolate for a visually striking alternative.
Necessary Kitchen Equipment for How Do You Make Butterfinger Balls
Having the right tools makes preparing Butterfinger Balls easier and mess-free. Gather these essentials before starting:
Fork or Dipping Tool: Essential for coating the balls in melted chocolate with minimal mess.ger Ball making experience, ensuring a mess-free, professional result.
Mixing Bowls: A large bowl is essential for combining the peanut butter mixture evenly.
Electric Mixer: Speeds up the mixing process and ensures a lump-free dough.
Measuring Cups and Spoons: For precise ingredient portions.
Baking Sheet with Parchment Paper: Prevents sticking and makes cleanup easier.
Microwave-Safe Bowl or Double Boiler: Ideal for melting chocolate smoothly without burning.
Step-by-Step Preparation
Creating Butterfinger Balls is a straightforward process that involves mixing, shaping, coating, and decorating. Follow these step-by-step instructions to ensure flawless results every time.
Preparing the Peanut Butter Mixture
The peanut butter mixture forms the rich, creamy base of the Butterfinger Balls. Here’s how to prepare it perfectly:
- Combine Ingredients: In a large mixing bowl, add creamy peanut butter and softened unsalted butter. Using an electric mixer, beat the two together until the mixture is completely smooth and free of lumps. This creamy base will hold the dry ingredients together.
- Add Sweeteners: Gradually sift in the powdered sugar while continuing to mix. The sugar sweetens the dough and provides structure. Mix until the sugar is fully absorbed, and the mixture thickens slightly.
- Incorporate Dry Ingredients: Stir in the graham cracker crumbs and crushed Butterfinger bars. Use a spatula or wooden spoon to gently fold them in, ensuring the crushed candy pieces and crumbs are evenly distributed throughout the mixture.
At this stage, the dough should be thick but moldable. If it feels too sticky, refrigerate it for 10-15 minutes before moving on to shaping.
Shaping the Mixture into Balls
Now that your peanut butter mixture is ready, it’s time to form the balls:
- Portion the Dough: Use a tablespoon or a small cookie scoop to portion out the mixture. Aim for evenly sized portions to ensure the balls are consistent and visually appealing.
- Form Balls: Roll each portion between your palms until a smooth, round ball forms. If the mixture sticks to your hands, lightly dust your palms with powdered sugar to prevent sticking.
- Chill: Arrange the balls on a baking sheet lined with parchment paper, ensuring they don’t touch each other. Place the sheet in the refrigerator for at least 30 minutes. This chilling step helps firm up the dough, making the chocolate coating process easier.
Tip: Chilling is crucial! If the dough is too soft, the balls may lose their shape when dipped in melted chocolate.
Melting the Chocolate Coating
The chocolate coating adds the perfect finishing touch to these Butterfinger Balls. Follow these steps for a silky-smooth finish:
- Melt Chocolate: Place the chocolate bark or chocolate chips in a microwave-safe bowl. Heat in 30-second intervals, stirring between each, until the chocolate is fully melted and smooth. If using a double boiler, keep the heat low and stir constantly to prevent burning.
- Add Coconut Oil (Optional): For a shinier, smoother coating, stir in a teaspoon of coconut oil into the melted chocolate. This step also makes the chocolate more fluid, making dipping easier.
Note: Avoid overheating the chocolate, as it can seize and become grainy. If this happens, adding a small amount of oil can help smooth it out.
Dipping and Decorating the Balls
Now comes the fun part—coating and decorating your Butterfinger Balls:
- Dip the Balls: Using a fork or a dipping tool, carefully submerge each chilled ball into the melted chocolate, ensuring it is fully coated.
- Remove Excess Chocolate: Lift the ball from the chocolate and gently tap the fork against the edge of the bowl, allowing excess chocolate to drip off.
- Place on Baking Sheet: Transfer the coated ball back onto the parchment-lined baking sheet. Make sure the balls remain spaced apart so the chocolate doesn’t stick together.
- Add Garnish: While the chocolate is still wet, sprinkle additional crushed Butterfinger pieces, decorative sprinkles, or a pinch of sea salt over the top for extra flair and crunch.
- Set the Coating: Allow the chocolate coating to harden at room temperature. For faster results, place the tray back in the refrigerator for about 15-20 minutes until the chocolate sets completely.
Once set, your Butterfinger Balls are ready to enjoy! In the next section, we’ll explore serving tips, storage options, and pro tips to keep your treats tasting fresh.
Serving, Storing, and Additional Tips
Serving Suggestions
Butterfinger Balls can be served:
- Chilled or Room Temperature: Serve cold for a firm bite or softened for a creamier texture.
- Party Platters: Arrange on a festive tray with other bite-sized desserts.
- Gift Boxes: Package in mini cupcake liners inside decorative boxes for gifting.
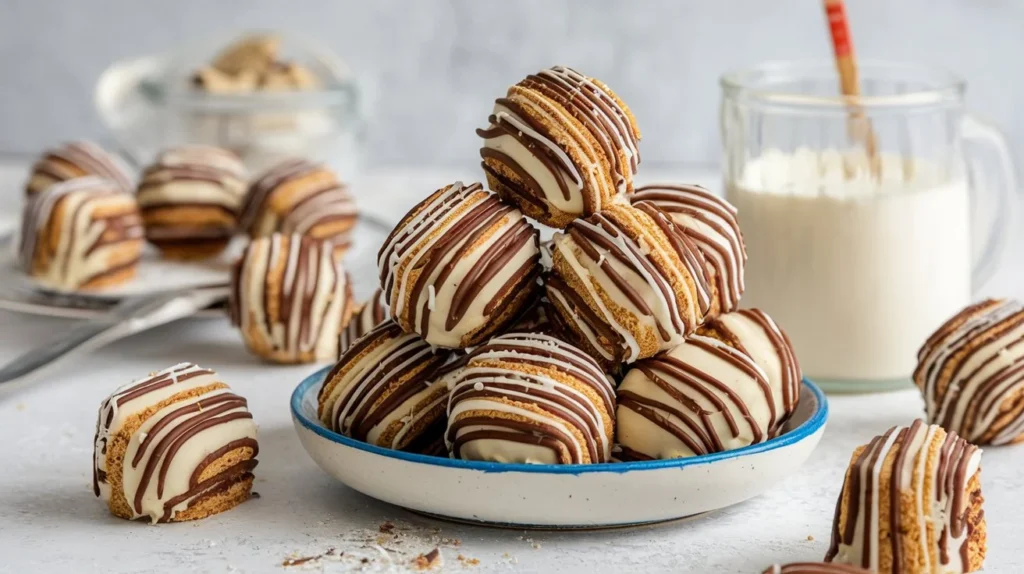
- Seasonal Themes: Add colored sprinkles or white chocolate drizzle for holidays.
Storage Instructions
- Refrigeration: Store in an airtight container for up to one week.
- Freezing: Freeze balls on a baking sheet, then transfer to a freezer-safe container for up to two months.
- Thawing: Defrost in the fridge for a few hours before serving.
Tips for Success
- Consistency Matters: Chill the dough if too soft to roll.
- Chocolate Coating: Ensure balls are well-chilled before dipping.
- Peanut Butter Choice: Use regular creamy peanut butter for best results.
- Garnish Promptly: Add sprinkles or toppings while the chocolate is wet.
Common Mistakes to Avoid
- Overheating Chocolate: Melt in short bursts, stirring frequently.
- Skipping Chilling Steps: Always chill before rolling and dipping.
- Using Natural Peanut Butter: Avoid due to oil separation.
- Rushing Preparation: Prep tools and ingredients beforehand.
These tips ensure Butterfinger Balls turn out delicious every time!
Frequently Asked Questions (FAQs)
1. Can I use crunchy peanut butter instead of creamy?
Yes, but it will create a chunkier texture and might make the mixture harder to roll smoothly.
2. How can I crush Butterfinger bars without making a mess?
Place the bars in a sealed plastic bag and crush them with a rolling pin for controlled, mess-free results.
3. Is it necessary to use graham cracker crumbs?
While optional, graham cracker crumbs help stabilize the mixture and balance the sweetness. Alternatives like digestive biscuits work too.
4. Can I make Butterfinger Balls ahead of time?
Absolutely! They can be made days in advance and stored in the fridge for up to a week or frozen for longer storage.
5. Why is my chocolate coating clumpy?
Clumpy chocolate often results from overheating or adding moisture. Melt the chocolate in short bursts, stirring frequently for smooth results.
6. Can I use white chocolate instead of regular chocolate?
Yes! White chocolate works well and adds a decorative contrast. Drizzle both types for a festive twist.
Conclusion
Butterfinger Balls are the perfect no-bake treat for any occasion, combining the creamy richness of peanut butter with the satisfying crunch of crushed Butterfinger candy bars. With their easy preparation, minimal ingredients, and customizable options, they’re ideal for holidays, parties, or as a sweet homemade gift.
By following the step-by-step instructions, using the right ingredients, and avoiding common mistakes, you’ll create picture-perfect Butterfinger Balls every time. Whether served chilled, decorated with festive toppings, or stored for later enjoyment, these bite-sized delights will impress family and friends alike.
Now it’s your turn—gather your ingredients and start making your own batch of irresistible Butterfinger Balls!

