Introduction
Imagine biting into a dessert that combines the rich, fudgy goodness of a brownie with the soft, chewy sweetness of a chocolate chip cookie. Well, that’s exactly what a brookie is — a delicious, two-in-one treat that satisfies every sweet craving in one bite. This brookie recipe will walk you through everything you need to know, from essential ingredients to baking techniques, so you can achieve that perfect balance of textures and flavors.
Whether you’re a seasoned baker or a newbie in the kitchen, making homemade brookies isn’t as complicated as it seems. With a little guidance, you can create a dessert that’s worthy of a bakery window display. This guide covers every step, tip, and trick to help you make gooey, chewy, and utterly irresistible brookies. So, grab your apron and let’s dive right in!
Introduction and Basics
What is a Brookie?
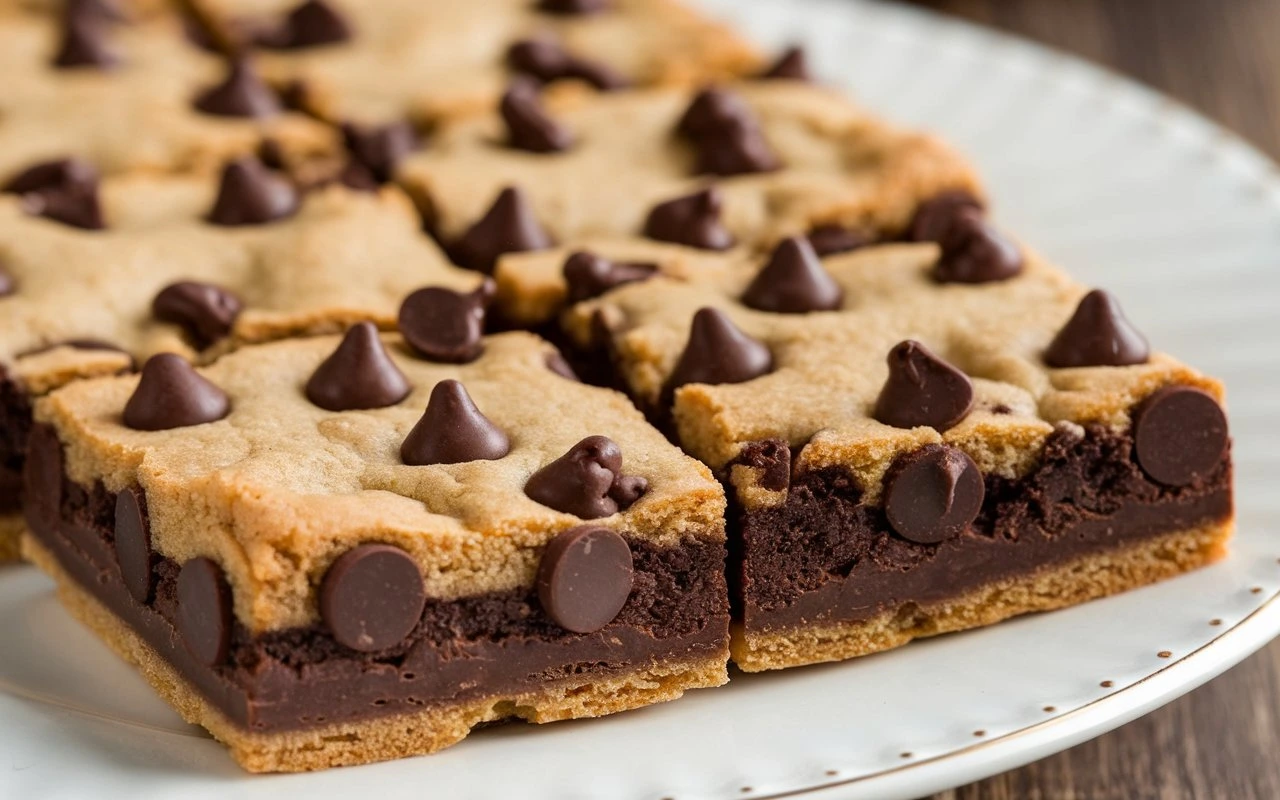
If you’ve never heard of a brookie, you’re in for a treat — literally! A brookie is the ultimate dessert mashup that combines the best parts of brownies and cookies. It’s made by layering fudgy brownie batter with chewy cookie dough to create a visually stunning, mouthwatering treat. Once baked, you get the rich chocolate intensity of a brownie on the bottom and the buttery, crumbly texture of a cookie on top.
What makes a brookie even more special is its versatility. You can customize it with add-ins like nuts, sprinkles, or chocolate chunks. Plus, they’re perfect for birthdays, holidays, or just a cozy night in with family. The contrast between the two textures and flavors is what makes brookies so unforgettable.
Where Did Brookies Originate?
While the exact origin of the brookie is a bit of a mystery, its concept follows the trend of hybrid desserts — think of cruffins (croissant + muffin) or cronuts (croissant + donut). Most people credit American bakeries for popularizing brookies, as they fit perfectly into the “bigger, better, bolder” dessert philosophy.
The genius of the brookie lies in its simplicity. By combining two beloved desserts into one, it creates something new, nostalgic, and exciting all at once. While the idea might seem modern, the love for layered desserts has been around for decades, if not centuries.
Why Are Brookies So Popular?
Brookies are loved for one simple reason: they offer the best of both worlds. If you’ve ever had to choose between a brownie and a cookie, you know how hard it can be. With a brookie recipe, you don’t have to choose.
But it’s not just about flavor — it’s also about texture. The dense, fudgy brownie layer contrasts perfectly with the soft, chewy cookie top. Each bite gives you a taste of both, creating a sensory experience that’s hard to forget. Plus, brookies are versatile and customizable, which makes them a fan-favorite for bakers and dessert lovers alike.
Step-By-Step Instructions to Make the Best Brookie Recipe
Making the perfect brookie recipe is a step-by-step process that requires patience and precision. But don’t worry — with the right guidance, you’ll have gooey, chewy brookies that look as good as they taste. This section covers the essential preparation steps and the process of creating a rich, chocolatey brownie layer that forms the foundation of every great brookie.
Preparation Steps Before Baking
Every great brookie recipe starts with good preparation. Setting up your kitchen properly can save you from last-minute scrambling and ensure smooth baking. Here’s how to get ready.
Preheating the Oven: Why It Matters
It’s tempting to skip preheating the oven, but doing so could ruin the texture of your brookies. Placing your brookies in a cold oven causes uneven baking, which can leave you with raw centers and overcooked edges.
- Set your oven to 350°F (175°C). This is the ideal temperature for a balance of chewiness and crisp edges.
- Preheating takes about 10-15 minutes, so start it early to avoid delays.
- If your oven has “hot spots” (areas that cook faster than others), rotate your pan halfway through baking for even results.
Preparing the Pan: Greasing vs. Using Parchment Paper
A sticky pan can ruin your brookies before you even taste them. That’s why it’s crucial to prep the pan properly. You have two main options:
- Grease the pan with butter, oil, or non-stick spray. While it prevents sticking, it can sometimes make the edges too crispy or greasy.
- Line the pan with parchment paper. This is the best method because you can easily lift the brookies out of the pan without flipping or scraping. Cut the parchment slightly larger than the pan and fold the edges over to create “handles” for easy removal.
Measuring Ingredients Properly
Accurate measurements are crucial in baking, especially when making brookies, where texture is everything. Too much flour? Dry brookies. Too little sugar? Bland flavor. Here’s how to get it right:
- Flour: Use the “spoon and level” method. Spoon the flour into the measuring cup, then level it off with a knife. This avoids packing too much flour into the cup, which can make the brookie layer too dense.
- Sugar: Brown sugar should be packed into the measuring cup firmly, while white sugar can be scooped directly.
- Butter: Use a kitchen scale if possible for precise measurements. If not, follow the pre-marked measurements on the butter stick wrapper.
- Cocoa powder: Just like flour, sift or whisk it before adding it to the mix. Cocoa tends to clump, and no one wants lumps of dry powder in their brownie layer.
Following these simple steps will ensure your brookie recipe turns out consistent every time. Now, let’s move on to the star of the show — the brownie layer.
How to Make the Brownie Layer
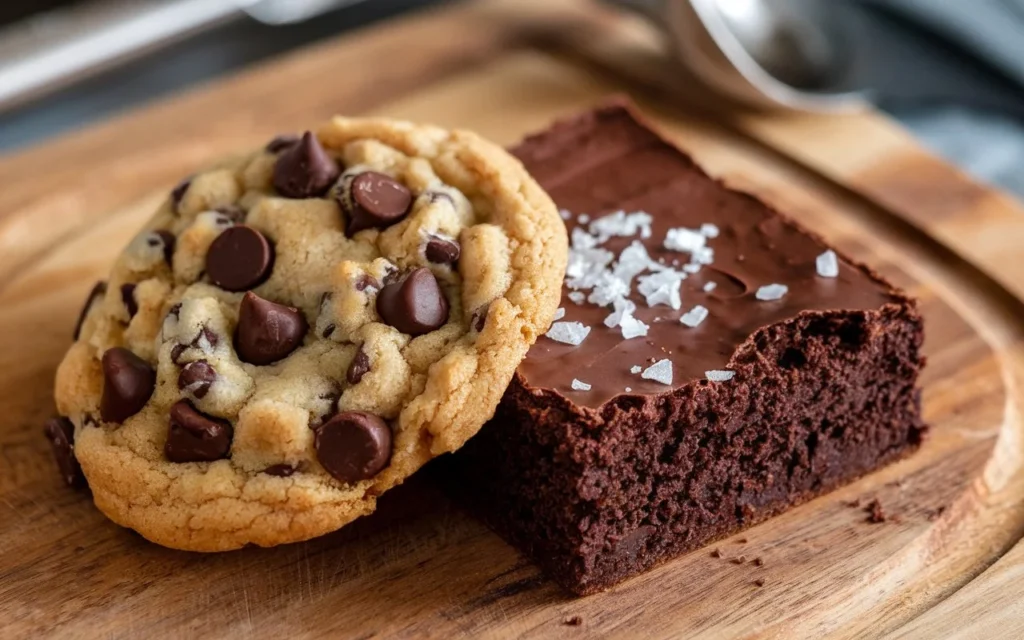
The brownie layer is the heart of every great brookie recipe. This fudgy base provides a rich, chocolatey foundation that perfectly contrasts with the soft, chewy cookie layer on top. Let’s walk through the process step by step.
Step 1: Mixing Dry Ingredients
The dry ingredients in the brownie layer ensure structure, texture, and flavor. Properly combining these ingredients is essential for achieving the perfect balance of fudginess and chewiness.
- Prepare the ingredients:
- ¾ cup all-purpose flour
- ⅓ cup unsweetened cocoa powder (high-quality cocoa gives a richer flavor)
- ½ teaspoon baking powder (this gives a subtle lift)
- ¼ teaspoon salt (essential for balancing the sweetness)
- Mix the dry ingredients:
- Add all the dry ingredients to a large mixing bowl.
- Use a whisk or a fine-mesh sifter to combine them thoroughly. This removes lumps (especially in cocoa powder) and evenly distributes the baking powder and salt.
- Break up any clumps: If you spot any large clumps of cocoa or flour, press them with a spoon to break them apart. You want a fine, smooth, even mixture.
Step 2: Preparing Wet Ingredients
The wet ingredients give the brownie layer its rich, gooey texture. By combining butter, sugar, and eggs, you’ll create a luscious base that mixes beautifully with the dry ingredients. Here’s how to do it right:
- Melt the butter:
- Measure out ½ cup (1 stick) of unsalted butter.
- Melt the butter in the microwave using 20-second intervals, stirring in between to avoid splattering. You want it fully melted but not too hot.
- Mix the butter with sugars:
- In a medium bowl, combine the melted butter with ¾ cup granulated sugar and ¼ cup packed brown sugar.
- Whisk until the mixture is smooth, glossy, and thick. The melted butter helps dissolve the sugar, creating a rich caramel-like flavor.
- Add eggs and vanilla:
- Crack in 2 large eggs one at a time, whisking until fully incorporated.
- Add 1 teaspoon vanilla extract for depth of flavor.
- Whisk until the mixture is shiny, smooth, and slightly thick.
Tips, Variations, and Customization Options
Once you’ve mastered the basics of the brookie recipe, it’s time to take it up a notch. With the right techniques, add-ins, and customizations, you can transform a simple brookie into a dessert masterpiece. From achieving that perfect chewy-fudgy balance to creating seasonal flavors, this part will show you how to become a true brookie expert.
Pro Tips for a Chewy, Gooey Brookie Recipe
If you’re aiming for that melt-in-your-mouth texture, these pro tips will help you master the art of brookies. The secret lies in achieving the ideal balance between chewy and fudgy textures.
How to Achieve the Perfect Texture (Chewy vs. Fudgy)
- Butter matters: Use melted butter for the brownie base. It adds richness and gives the brownies a dense, moist texture. For the cookie dough, room-temperature butter helps create a soft, tender crumb.
- Don’t overmix: Overmixing activates the gluten in the flour, making the brookie dense and bread-like. Stir until just combined — no more!
- Control the sugar ratio: Use a higher ratio of brown sugar in the cookie dough layer. Brown sugar contains molasses, which creates a chewier texture compared to granulated sugar.
- Timing is everything: Bake your brookies just until a toothpick comes out with moist crumbs. Don’t wait until it’s completely clean, or you’ll end up with dry brookies.
- Let them cool: Resist the urge to cut brookies immediately after baking. Cooling allows the layers to set, which gives you those sharp, distinct layers when you cut them.
Avoid These Common Mistakes
- Undercooking the center: If the center is undercooked, you may have layered the cookie dough too thick. Spread it out evenly to avoid a raw center.
- Overbaking: If the edges are too hard, you likely baked the brookies too long or at too high a temperature.
- Greasing without parchment: While greasing the pan works, parchment paper is better. It prevents sticking and makes it easy to lift out the entire slab.
With these tips, you’ll be able to make chewy, gooey brookies that are bakery-quality every time.
Flavor Variations and Add-Ins for Your Brookie
Why settle for classic brookies when you can add your own personal touch? With add-ins and flavor customizations, you can create endless variations that match your taste and mood.
Popular Add-ins
- Nuts: Add chopped pecans, almonds, or walnuts for a crunchy contrast to the chewy texture.
- Marshmallows: Mini marshmallows melt into gooey pockets, giving you a s’mores-like experience.
- Caramel: Swirl in caramel sauce before baking for a sweet, sticky surprise in every bite.
- Sprinkles: Colorful sprinkles make brookies party-ready and fun for kids.
- Chocolate Chips: Dark, milk, or white chocolate chips take the chocolate factor to the next level.
Seasonal Flavors
- Pumpkin Spice Brookies: Add 1 teaspoon of pumpkin pie spice to the cookie dough layer for an autumn-inspired treat.
- Peppermint Brookies: Mix crushed peppermint candies or peppermint extract into the brownie batter for a festive holiday twist.
- Cinnamon Swirl Brookies: Add a swirl of cinnamon-sugar mixture between the layers for a cinnamon roll-inspired dessert.
- Orange Chocolate Brookies: Add 1 teaspoon of orange zest to the brownie batter for a citrusy flavor boost.
How to Create Your Own Custom Brookie
Feeling adventurous? Here’s how you can create a custom brookie that’s one-of-a-kind.
- Choose your base: Start with a classic brownie layer, but feel free to add cocoa nibs, espresso powder, or chopped chocolate.
- Pick your cookie dough flavor: Classic chocolate chip is the default, but you can switch it up with snickerdoodle, peanut butter, or oatmeal cookie dough.
- Select your toppings: Top with sea salt flakes, colorful sprinkles, or even drizzle melted chocolate or caramel after baking.
- Get creative with shapes: Instead of a square pan, use cookie cutters to create heart- or star-shaped brookies for holidays and special events.
With endless combinations, you’ll never get bored of brookies. Try a new flavor every week!
Vegan and Gluten-Free Brookie Recipe Options
If you have dietary restrictions, you can still enjoy this delicious brookie recipe. Here’s how to make them vegan, gluten-free, or both!
Substituting Butter, Eggs, and Flour
- Butter: Swap butter for vegan butter or coconut oil. Both work well and maintain that rich flavor.
- Eggs: Replace eggs with a flaxseed egg (1 tablespoon ground flaxseed + 3 tablespoons water = 1 egg) or an unsweetened applesauce substitute (¼ cup applesauce = 1 egg).
- Flour: Use gluten-free all-purpose flour blends. Look for 1:1 substitutes to avoid changing the texture too much.
Expert Advice, Troubleshooting
Even with a foolproof brookie recipe, things can sometimes go sideways. From sunken centers to burnt edges, mistakes happen. But don’t worry — with a little know-how, you can fix most brookie issues and prevent them from happening next time. This section also covers how to scale recipes, store leftovers, and reheat brookies to keep them fresh and delicious.
Common Problems and How to Fix Them
No one likes to see a batch of brookies go wrong, but these issues are more common than you might think. Here’s how to troubleshoot the most frequent brookie recipe mishaps.
Why Did My Brookie Sink in the Middle?
If your brookie has a sunken center, it’s probably due to one of these issues:
- Underbaking: If you take brookies out of the oven too early, the center won’t have had enough time to set.
Solution: Bake for a few minutes longer and use the toothpick test. It should come out with a few moist crumbs, not wet batter. - Overmixing the batter: Overmixing creates excess air in the batter, which collapses as it cools.
Solution: Mix only until combined. Don’t whisk aggressively after the dry ingredients are added. - Too much leavening: If you added too much baking powder or baking soda, the brookie may rise rapidly, then collapse.
Solution: Measure accurately and stick to the recommended amounts.
How to Fix Overcooked or Burnt Edges
Dry, crunchy edges are a clear sign of overbaking. This is one of the most common mistakes in a brookie recipe.
- Cause: Overbaking, using a pan that’s too thin, or baking at too high a temperature.
Solution:- Check brookies 5 minutes before the recipe suggests. If the edges are firm but the center is still soft, take them out.
- Use a light-colored baking pan (dark pans absorb more heat, leading to overcooked edges).
- Cut away the hard edges and repurpose them as toppings for ice cream or yogurt.
What If My Brookie is Too Dry?
No one wants a dry brookie. If your brookies came out more like biscotti than brownies, here’s why:
- Overbaking: The most common reason for dry brookies is baking them too long.
Solution: Keep a close eye on your brookies. Bake until the toothpick comes out with moist crumbs, not dry crumbs or a clean stick. - Wrong ingredient ratios: Too much flour or too little butter can result in a dry brookie.
Solution: Use the “spoon and level” method to measure flour accurately. Don’t scoop it directly from the bag. - Lack of moisture: Missing ingredients like eggs or using dry toppings can reduce moisture.
Solution: If your brookies are already baked, brush them with a sugar syrup or warm them in the microwave with a damp paper towel.
How to Scale Up or Down Your Brookie Recipe
Sometimes you want to make brookies for a crowd, and other times, you just want a personal-sized treat. Here’s how to do both.
How to Make a Large Batch for Parties
- Use a larger pan: Double or triple the ingredients and bake in a 9×13-inch or 12×18-inch pan.
- Adjust the bake time: Larger pans may require an extra 5-10 minutes of bake time. Keep a close eye on the brookies and use the toothpick test.
- Line with parchment paper: Make sure you have enough parchment to cover the sides so you can lift the brookies out cleanly.
Scaling Tips for a Single-Serving Brookie
- Use a ramekin or small baking dish: Cut the recipe to 1/4 of the original and bake it in a single-serving dish.
- Reduce the bake time: Mini brookies bake faster, so start checking for doneness at 12-15 minutes.
- Microwave option: You can make a single-serve brookie in a mug by combining brownie and cookie batter, then microwaving for 60-90 seconds.
FAQs (Frequently Asked Questions About Brookie Recipe)
What is a brookie made of?
A brookie is a dessert hybrid made of two layers: a rich, fudgy brownie base and a soft, chewy cookie top. It combines the best of both worlds into one irresistible treat.
How do I get a perfectly chewy brookie?
Use brown sugar in the cookie dough, avoid overbaking, and ensure you don’t overmix the batter. The key is to remove the brookies from the oven while the center is still slightly underdone.
Can I freeze brookies for later use?
Yes! Freeze brookies by wrapping them in plastic wrap, placing them in a freezer-safe bag, and freezing for up to 2-3 months. Thaw at room temperature or reheat in the oven.
What are the best add-ins for a brookie recipe?
Some fan-favorite add-ins include chocolate chips, marshmallows, nuts (like walnuts or pecans), caramel swirls, sprinkles, and candy pieces like M&Ms.
How long does it take to bake a brookie?
The typical bake time for brookies is 30-35 minutes at 350°F (175°C). Bake times may vary depending on pan size and thickness.
Can I make a vegan or gluten-free version of a brookie?
Yes, you can! Use vegan butter, flaxseed eggs, and gluten-free flour blends to make a vegan, gluten-free brookie that’s just as delicious as the original.

