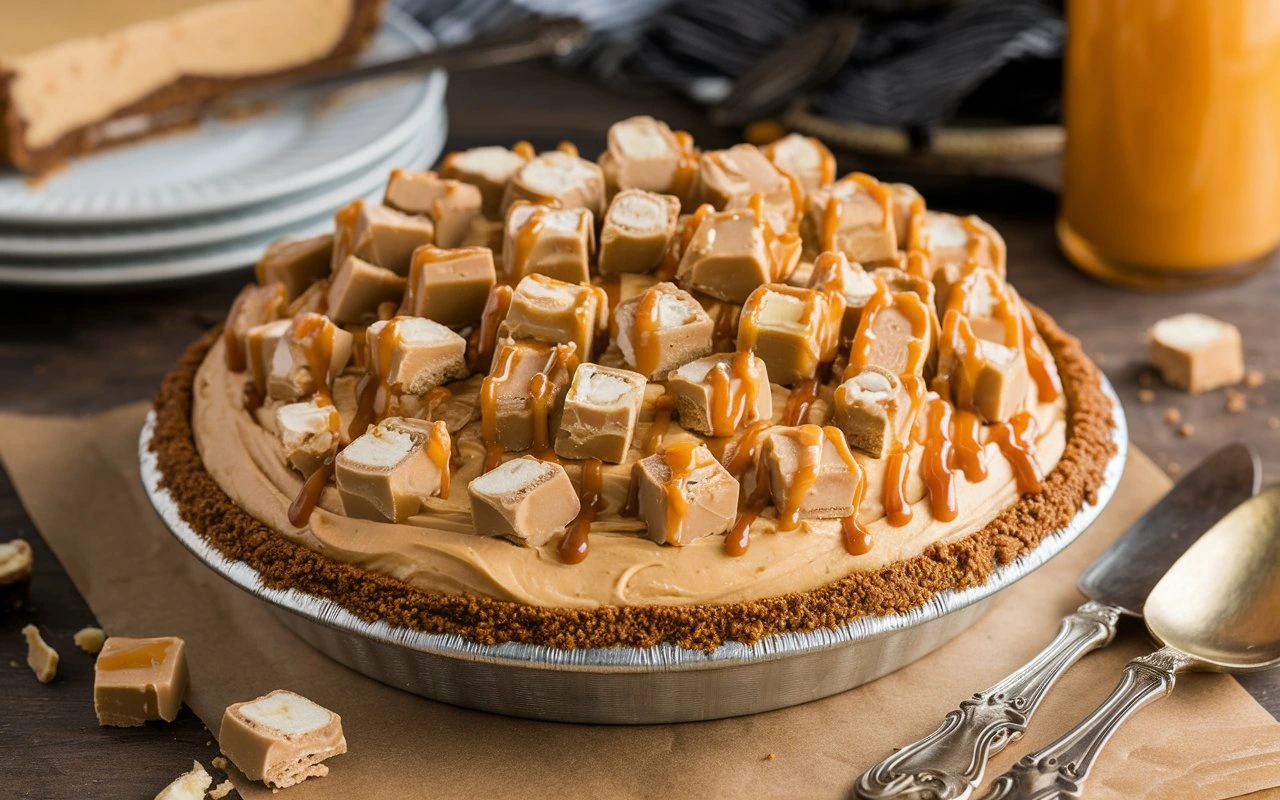
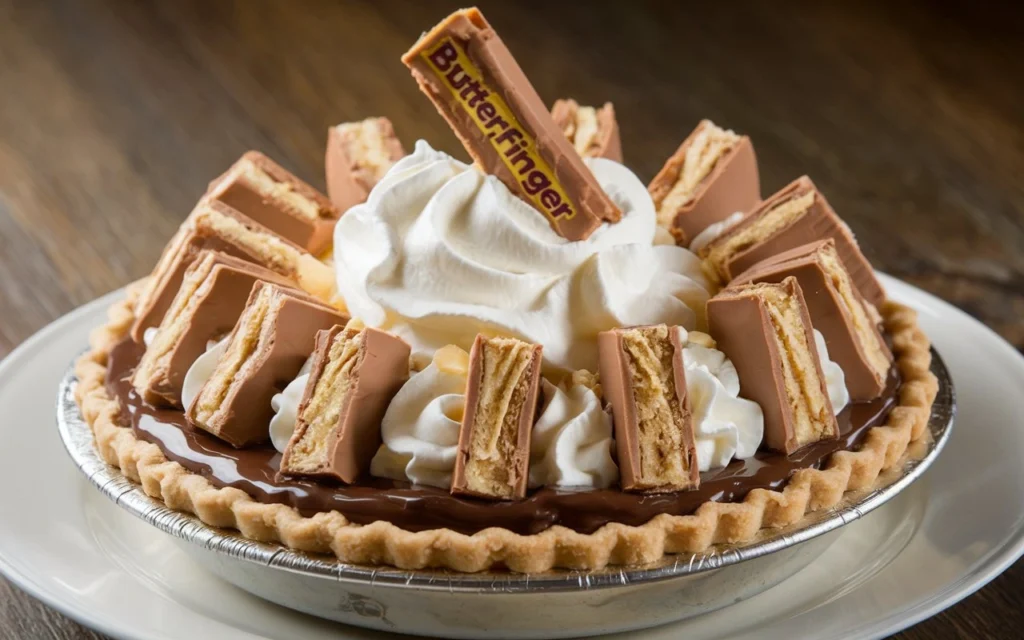
Butterfinger pie is one of those desserts that feels like a celebration in every bite. The smooth, creamy filling paired with crunchy Butterfinger candy bits makes it a true showstopper at parties, potlucks, and family dinners. Best of all, it’s a no-bake dessert, which means no hot ovens and no fuss. Whether you’re making it for a weekend treat or a holiday gathering, this pie is sure to be a crowd-pleaser.
From learning about the key ingredients to mastering the step-by-step process, this guide will walk you through everything you need to create a perfect Butterfinger pie. We’ll also cover some pro tips, storage advice, and answer your most pressing questions. So, get ready to whip up a dessert that’s as impressive as it is easy to make.
Introduction and Overview
What is a Butterfinger Pie?
If you’ve never had a Butterfinger pie before, you’re in for a real treat. This irresistible dessert blends the classic flavors of creamy peanut butter, smooth whipped filling, and crunchy Butterfinger candy pieces. All of this deliciousness sits atop a chocolate or graham cracker crust, creating a mouthwatering combination of flavors and textures.
Unlike traditional baked pies, Butterfinger pie is a no-bake creation. This means you can make it without ever turning on your oven. Its simplicity makes it perfect for beginners or anyone short on time. Just mix, chill, and serve. No fancy baking skills are required, and the results are always delicious.
Another perk? The texture! The pie’s creamy filling contrasts beautifully with the candy’s crunchy bits, giving each bite a little surprise. It’s a nostalgic blend of childhood candy dreams with the sophistication of a homemade dessert.
Why You’ll Love This Butterfinger Pie
There are so many reasons to love this Butterfinger pie, but here are a few highlights that make it unforgettable:
- No-Bake Simplicity: No oven, no baking skills required. Just mix, chill, and serve.
- Perfect for Any Occasion: Whether it’s a family dinner, a potluck, or a holiday party, this pie always steals the show.
- Kid-Friendly and Fun: Kids love helping crush the Butterfinger candies and sneaking a few bites along the way.
- Make-Ahead Convenience: Need a dessert that you can prepare in advance? This pie can be made the day before and stored in the fridge.
This pie is proof that desserts don’t have to be complicated to be delicious. If you’ve got a few simple ingredients and a love for sweet treats, you’re ready to go.
Variations of Butterfinger Pie
While the classic Butterfinger pie is a total hit, there are plenty of fun twists you can try to suit your taste buds or the occasion. Here are a few irresistible variations:
- Frozen Butterfinger Pie: Want a cool, ice-cream-like texture? Freeze your pie for a firmer, sliceable dessert that tastes like a frozen treat.
- Mini Butterfinger Pies: Use mini tart pans or cupcake liners to create bite-sized versions of the pie. Perfect for parties and potlucks.
- Butterfinger Cheesecake Pie: Add a touch of cheesecake flavor by using a cheesecake-flavored filling instead of the traditional peanut butter base.
- Healthy Alternative: Swap out cream cheese for Greek yogurt and opt for sugar-free whipped topping to make a lighter version.
With so many ways to customize it, you’ll never run out of ideas. Stick with the classic, or get creative with these fun spins on the original recipe.
Ingredients & Preparation
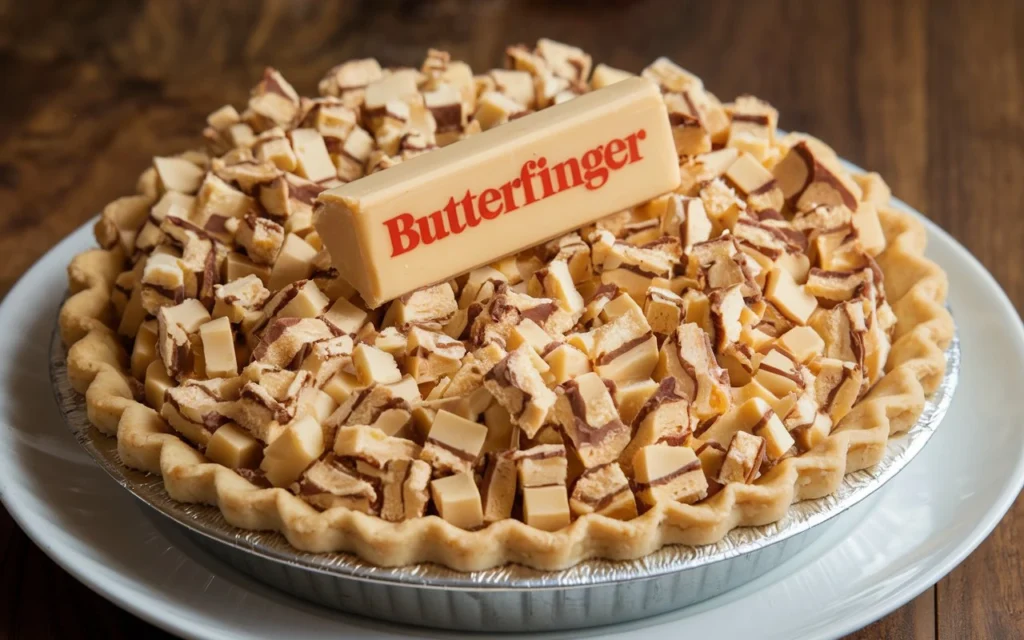
Essential Ingredients for Butterfinger Pie
To make a truly mouthwatering Butterfinger pie, you’ll need a few essential ingredients. Each one plays a key role in creating that smooth, creamy filling and crunchy, candy-packed topping that makes this pie unforgettable.
1. Crust Options
A solid, flavorful crust is the backbone of any great pie, and Butterfinger pie is no exception. Here are three crust options to choose from:
- Oreo Crust: Crushed chocolate sandwich cookies combined with melted butter to create a rich, chocolatey base. This option is ideal if you want a deeper, more indulgent flavor.
- Graham Cracker Crust: Classic and timeless, a graham cracker crust is sweet, buttery, and perfectly balanced against the creamy filling.
- Pre-Made Crust: If you’re short on time, a store-bought crust works just as well. It’s a quick, hassle-free option that cuts down on prep time.
2. Filling Components
The heart of a Butterfinger pie is its rich, creamy filling. This blend of smooth peanut butter and sweet cream cheese creates a luscious texture that’s hard to resist. Here’s what you’ll need:
- Cream Cheese: Use softened cream cheese to achieve a silky-smooth base. If it’s too cold, you’ll end up with a lumpy filling.
- Peanut Butter: Smooth peanut butter is best. It blends perfectly with the cream cheese to create that signature rich, nutty flavor.
- Powdered Sugar: Adds sweetness and helps create a thick, velvety filling.
- Whipped Topping: Light and airy whipped topping (like Cool Whip) gives the filling its fluffy, mousse-like texture.
3. Toppings & Garnishes
This is where your pie goes from delicious to irresistible. Toppings give the pie visual appeal and extra flavor.
- Butterfinger Candy Bars: Crushed Butterfinger bits add the famous crunch and candy-bar flavor that makes this pie unique.
- Extra Whipped Topping: Swirl whipped topping on top for a bakery-style presentation.
- Optional Garnishes: Drizzle melted chocolate over the top, or sprinkle on mini chocolate chips or sprinkles for added flair.
Kitchen Tools You’ll Need
To create a Butterfinger pie that’s as good as it looks, make sure you have these essential tools on hand:
- Mixing Bowls: Use them for mixing the filling and the crust.
- Electric Mixer: Beat the cream cheese, peanut butter, and sugar into a smooth, creamy filling.
- Spatula: This helps you fold in whipped topping and spread the filling evenly.
- Food Processor (Optional): Quickly crush Butterfinger bars, Oreos, or graham crackers.
- Pie Dish: A 9-inch pie dish works best, but mini tart pans are great if you want to make personal-sized servings.
How to Make Butterfinger Pie: Step-by-Step Instructions
Prepare the Crust
- Crush the Base: If you’re using Oreos or graham crackers, crush them in a food processor or by placing them in a sealed plastic bag and smashing them with a rolling pin.
- Mix with Butter: Combine the crushed cookies or crackers with melted butter until the mixture feels like wet sand.
- Press Into Pan: Firmly press the mixture into the bottom and up the sides of a 9-inch pie dish.
- Chill the Crust: Place the crust in the refrigerator for 15–20 minutes to firm up before adding the filling.
- Step 2: Make the Filling
- Beat the Cream Cheese: Using an electric mixer, beat the softened cream cheese until smooth and lump-free.
- Add Peanut Butter & Sugar: Add the peanut butter and powdered sugar. Beat the mixture until smooth, creamy, and fluffy.
- Fold in Whipped Topping: Use a spatula to gently fold the whipped topping into the mixture. Be careful not to over-mix, as you want to keep the filling light and airy.
- Add Butterfinger Pieces: Crush the Butterfinger candy bars and fold them into the filling for extra crunch and bursts of flavor.
Assemble the Pie
- Spread the Filling: Pour the filling over the chilled crust and smooth it out with a spatula, creating an even surface.
- Top with Butterfinger Candy: Sprinkle crushed Butterfinger pieces on top for an eye-catching finish.
Chill & Set
- Chill the Pie: Place the pie in the refrigerator for at least 4 hours (or overnight) to allow the filling to firm up. This step is crucial if you want clean, picture-perfect slices.
Serve & Enjoy
- Slice & Serve: Remove the pie from the fridge and slice it into even pieces. Add extra whipped topping or a sprinkle of Butterfinger bits on each slice for presentation.
With this simple method, you’re guaranteed a creamy, crunchy, picture-perfect Butterfinger pie every time. Ready for the next part? Let’s move on to expert tips, fun variations, and storage advice!
Tips, Variations, and Storage
Pro Tips for the Perfect Butterfinger Pie
Want to make your pie look and taste like it came from a bakery? Follow these tried-and-true tips:
- Soft Cream Cheese is Key: Let the cream cheese sit at room temperature for 30 minutes before using. If it’s too cold, you’ll end up with lumps in your filling.
- Don’t Over-Mix the Whipped Topping: When folding in the whipped topping, be gentle! Over-mixing will knock out the air, making your filling too dense.
- Chill for the Right Amount of Time: Patience pays off. The pie needs to chill for at least 4 hours (preferably overnight) to achieve a firm texture.
- Keep the Butterfinger Pieces Crunchy: Crush Butterfinger candy bars right before adding them to the filling to prevent them from getting soggy.
Delicious Variations to Try
Frozen Butterfinger Pie
Want an ice-cream-like dessert? Freeze it!
- How to Do It: Follow the same recipe, but freeze the pie instead of refrigerating it. Thaw for 10 minutes before serving.
- Texture: Similar to an ice cream pie, but with the added crunch of Butterfinger pieces. Perfect for hot summer days!
Mini Butterfinger Pies
Mini pies are fun, portable, and perfect for parties.
- How to Do It: Use a cupcake tin or mini tart pans. Press the crust into each cup and divide the filling evenly.
- Why It Works: It’s a party-friendly option that gives each guest their own personal pie!
Butterfinger Cheesecake Pie
Turn your Butterfinger pie into a cheesecake-inspired masterpiece.
- How to Do It: Swap the peanut butter for ½ cup of sour cream and increase the cream cheese by 4 ounces. Add a splash of vanilla extract for added flavor.
- Why It Works: The cheesecake filling adds tanginess, making the pie taste like a cross between a cheesecake and a candy bar.
Healthy Butterfinger Pie
Cut down on sugar and calories while still enjoying this tasty treat.
- How to Do It: Swap cream cheese for Greek yogurt, use a sugar-free whipped topping, and opt for a sugar-free peanut butter.
- Benefits: Lower in calories and sugar, but still creamy, crunchy, and delicious.
How to Store Butterfinger Pie
Refrigeration Tips
If you’re lucky enough to have leftovers, here’s how to store them:
- How Long It Lasts: The pie stays fresh for 4-5 days when stored in the refrigerator.
- Storage Tip: Cover the pie with plastic wrap or place it in an airtight container to prevent it from drying out.
Freezing Instructions
Want to make it ahead of time or save some for later? Here’s how:
- How to Freeze: Wrap the entire pie or individual slices in plastic wrap. Place them in a freezer-safe container or zip-top bag.
- How Long It Lasts: Butterfinger pie lasts up to 2 months in the freezer.
- How to Thaw: Thaw the pie in the fridge overnight for the best texture and taste.
Nutritional Information & Serving Suggestions
Calories and Nutrition Facts
Calories Per Slice
When it comes to indulgent desserts like Butterfinger pie, it’s good to know what you’re eating. On average, one slice (based on an 8-slice pie) contains about 350-450 calories, depending on the ingredients and portion size. The use of peanut butter, cream cheese, and Butterfinger candy bars naturally increases the calorie count, but let’s be honest — it’s totally worth it.
If you want to reduce the calorie content, consider using lighter alternatives, such as Greek yogurt instead of cream cheese or sugar-free whipped topping. These small swaps can significantly reduce the calorie count while still keeping it creamy and flavorful.
Breakdown of Fat, Sugar, and Protein
The nutritional profile of a classic Butterfinger pie varies depending on the specific ingredients used, but here’s a general idea of what to expect per slice:
- Total Fat: 20-25g (from peanut butter, cream cheese, and Butterfinger bits)
- Sugar: 30-40g (from powdered sugar, whipped topping, and Butterfinger candy)
- Protein: 6-8g (thanks to the peanut butter and cream cheese)
While this pie is definitely a sweet indulgence, it does offer a small protein boost, especially if you use protein-enriched peanut butter. For those looking to reduce the sugar content, you can use sugar-free powdered sugar and candy alternatives.
Serving Suggestions
Best Occasions to Serve Butterfinger Pie
A Butterfinger pie fits into nearly any event where desserts are celebrated. It’s the kind of treat that feels special but doesn’t require hours of preparation. Here are some ideal occasions to serve it:
- Birthdays: Skip the traditional birthday cake and serve something different! Guests will be delighted.
- Holidays: Whether it’s Thanksgiving, Christmas, or Easter, this pie is a welcome addition to any dessert table.
- BBQs & Cookouts: This chilled, no-bake dessert is a perfect way to end a summer BBQ.
- Potlucks: Since it’s easy to transport and serve, this pie is a hit at potluck dinners.
Perfect Pairings
Pairing desserts with the right drink can make the experience even better. Here’s what to serve alongside Butterfinger pie:
- Coffee: The bitterness of coffee balances the sweet, rich flavors of the pie.
- Milk: A cold glass of milk is the classic pairing for sweet, chocolatey desserts.
- Hot Cocoa: For a cozy, wintertime vibe, serve this pie with a steaming cup of hot cocoa.
FAQs About Butterfinger Pie
How do I keep my Butterfinger pie from being too soft?
Chill the pie for at least 4 hours or overnight. Use softened (not warm) cream cheese, avoid over-mixing whipped topping, and ensure the crust is well-chilled.
Can I make Butterfinger pie without cream cheese?
Yes! Substitute with Greek yogurt, mascarpone cheese, or just whipped topping for a lighter texture.
What type of crust works best?
Oreo crust is most popular for its chocolate flavor. Graham cracker crust is a lighter, buttery alternative. Store-bought crusts are convenient.
Can Butterfinger pie be frozen?
Absolutely! Wrap it tightly, freeze for up to 2 months, and thaw in the fridge overnight for an ice-cream-like texture.
How far in advance can I make it?
Prepare it 1-2 days ahead. Longer chilling enhances flavor and texture.
Can I use other candies?
Yes! Try Reese’s Cups, Snickers, Twix, or Heath Bars for a creative twist.
Conclusion
Butterfinger pie is the ultimate no-bake dessert that’s as easy to make as it is delicious to eat. This sweet, creamy pie with a crunchy Butterfinger topping is a fan-favorite at birthdays, barbecues, and holiday parties. The combination of smooth peanut butter, tangy cream cheese, and light whipped topping makes for a filling that’s both luscious and airy. Add in that Oreo or graham cracker crust, and you’ve got a dessert that’s downright addictive.
One of the best parts about this pie is its versatility. You can make it your own by swapping out the crust, switching the candy, or even freezing it for a summer-friendly frozen dessert. Whether you serve it at a potluck, holiday dinner, or family movie night, it’s bound to be a hit. So, grab your ingredients, follow the simple steps, and treat yourself to a homemade Butterfinger pie that tastes like something straight out of a bakery.

