Introduction
There’s just something magical about the classic s’more — a perfect blend of sweet, crunchy, and gooey goodness that instantly sparks childhood nostalgia. But guess what? You no longer need a campfire in the middle of the woods to enjoy this treat. A DIY s’more bar brings the fun straight to your backyard, party, or even a wedding reception. It’s interactive, customizable, and, let’s be honest, downright delicious.
This guide will walk you through everything you need to create a stunning, functional, and safe s’more bar. From choosing the perfect location to organizing the ultimate spread of ingredients and decorations, we’ve got you covered. Ready to turn your next event into a sweet sensation? Let’s get started with Part 1: Setting Up Your S’more Bar.
How to Set Up Your S’more Bar
Why Setting Up a S’more Bar Matters
Sure, you could just toss some marshmallows, chocolate, and graham crackers on a table and call it a day. But where’s the fun in that? A well-thought-out s’more bar not only looks impressive but also ensures that every guest—young and old—has an unforgettable experience. Plus, a little planning can prevent messy mishaps (hello, melted chocolate disasters!).
Here’s how to do it the right way.
Choosing the Perfect Location for a S’more Bar
Whether you’re hosting a backyard BBQ, an indoor birthday party, or a rustic wedding, picking the right location for your DIY s’more bar is crucial. It’s not just about aesthetics—safety, accessibility, and guest flow are all part of the equation.
Indoor or Outdoor?
- Outdoor Setup: Ideal for backyard parties, summer gatherings, and weddings. Offers that authentic “campfire” vibe.
- Indoor Setup: Perfect for colder months or when weather isn’t on your side. Use flameless s’more makers or electric burners.
Location Tips:
- Place it in a central spot that’s easy to access but not in a high-traffic area.
- Keep it near (but not too close to) your seating area, so guests can roast and relax.
- Avoid placing it near flammable materials, especially if using open flames.
Essential Tools and Equipment for a S’more Bar
You can’t have a s’more bar without the proper tools. While marshmallows, chocolate, and graham crackers are essential, you’ll need the right equipment to pull off a smooth setup.
1. Heat Source
The heat source is the heart of your s’more bar. It’s what turns marshmallows from soft pillows into gooey, golden perfection. Here are your top options:
- Portable Fire Pit: Great for outdoor parties and weddings. It creates a rustic, campfire-like experience.
- Tabletop S’more Maker: Best for indoor setups. These small, flameless burners are safe for kids and easy to manage.
- Chafing Fuel Cans: Safe, simple, and effective. These cans work like magic, especially at weddings or events with strict fire codes.
Pro Tip: If you’re indoors, skip the open flames. Use electric s’more makers or gel fuel cans to keep things safe and compliant.
2. Roasting Sticks
Nobody wants to burn their fingers while roasting marshmallows. Stock up on the right roasting sticks for a smooth guest experience.
- Bamboo Skewers: Cheap and disposable, but they can burn.
- Metal Roasting Sticks: Reusable and heat-resistant, plus they look fancy.
- Telescopic Roasting Sticks: Adjustable, safe, and guest-friendly.
Safety Tips for Your DIY S’more Bar
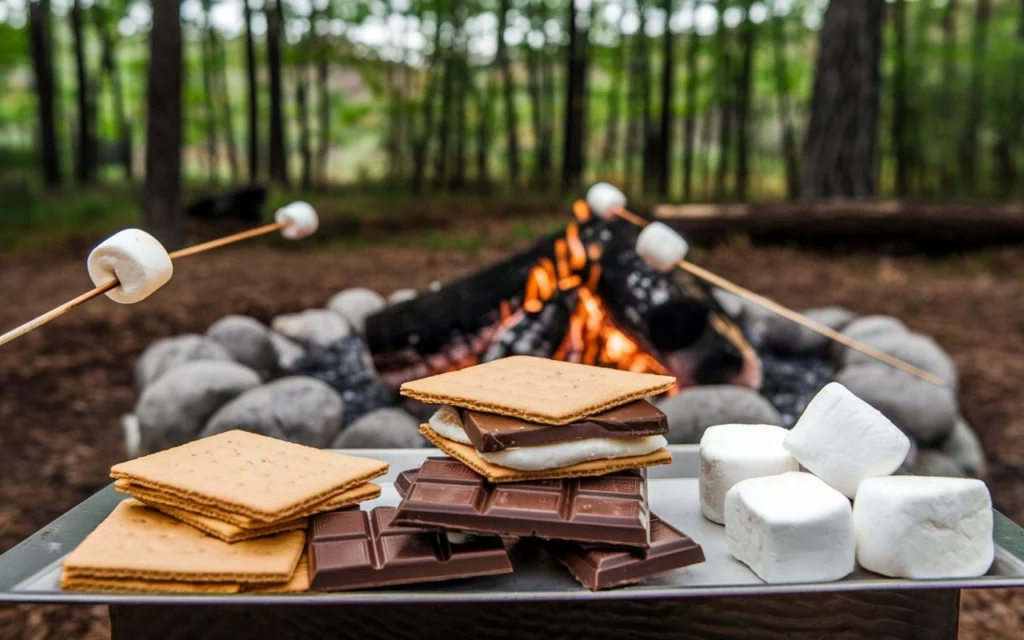
It’s all fun and games until someone accidentally burns themselves. Since s’more bars often involve open flames or hot surfaces, safety should be a priority. But don’t worry, a few small precautions can prevent big problems.
Fire Safety Rules
- Keep a fire extinguisher or water bucket nearby. It’s better to be safe than sorry.
- Use long roasting sticks. This keeps guests (especially kids) at a safe distance from the flame.
- Supervise children at all times. Kids love s’mores, but safety comes first.
Guest Instructions
- Place a simple “How to Roast Safely” sign near the s’more bar.
- Include visual guides or step-by-step instructions so kids and adults can see how to do it right.
How to Create a Stunning S’more Bar Display
A s’more bar isn’t just about taste; it’s also about presentation. The visual appeal of your setup can make or break the experience. Here’s how to make it look as good as it tastes.
Themed Decor Ideas
- Rustic Charm: Use wooden trays, mason jars, and natural elements like pinecones and greenery.
- Wedding Elegance: Opt for white platters, clean lines, and floral arrangements.
- Kid-Friendly Fun: Add bright colors, playful signs, and marshmallows shaped like stars or animals.
Organize Your Ingredients
- Use separate containers for each ingredient (like jars or trays) to keep them fresh and organized.
- Group marshmallows, chocolate, and graham crackers in a clear, visible layout.
- Add cute, hand-written labels so guests know what’s what.
Common Mistakes to Avoid When Setting Up a S’more Bar
Even the best plans can go sideways. Avoid these rookie mistakes, and you’ll be a s’more bar pro in no time.
- Mistake #1: No Fire Safety Plan — Always keep a fire extinguisher handy and supervise kids.
- Mistake #2: Running Out of Ingredients — Stock up on extra marshmallows, chocolate, and graham crackers. They disappear fast!
- Mistake #3: Poor Table Layout — Crowded setups lead to spills and guest confusion. Keep it neat.
- Mistake #4: No Roasting Stick Disposal Plan — Designate a spot for used sticks so they don’t clutter the bar.
- Mistake #5: Unclear Guest Instructions — Clear signage ensures everyone knows how to roast safely.
How to Set Up a S’more Bar
Setting up a s’more bar isn’t just about putting ingredients on a table. It’s about creating a fun, interactive experience that looks amazing and runs smoothly. Whether you’re hosting an outdoor summer gathering or an indoor winter party, this part of the guide will help you design a safe, stylish, and stress-free setup.
Choosing the Perfect Location
One of the first steps in setting up your DIY s’more bar is picking the right location. Should it be indoors or outdoors? Each option has its perks, but your event type, weather, and space availability will help you decide.
Indoor vs. Outdoor Setup
- Outdoor Setup:
Outdoor setups give off that authentic “campfire” vibe, making it ideal for weddings, backyard parties, or summer cookouts. You can use a portable fire pit or a chafing dish as your heat source. It also allows more space for guests to move freely. - Indoor Setup:
Hosting indoors? No problem. Tabletop s’more makers and gel fuel cans work perfectly inside, plus they’re safer and smokeless. Indoor setups are ideal for birthday parties, bridal showers, and holiday celebrations where outdoor weather isn’t ideal.
Space Considerations and Layout Planning
The space you choose should offer comfort, safety, and accessibility for all guests. Here’s how to plan it right:
- Room to Roam: Guests should be able to move around the s’more bar without crowding each other. A spacious, well-lit area works best.
- Table Size: Ensure the table is large enough to display all ingredients, roasting sticks, and safety gear. For bigger events, a 6-8 ft table works best.
- Guest Flow: Set up the s’more bar in a way that allows for easy traffic flow. Place signs so guests know where to start and finish.
How to Make the S’more Bar Accessible to All Guests
From kids to seniors, everyone should be able to enjoy the fun. Here’s how to make it inclusive:
- Child-Friendly Additions: Use shorter tables or add step stools for kids to access ingredients safely.
- Allergy-Friendly Options: Include gluten-free crackers, vegan marshmallows, and allergy-safe chocolate options.
- Clear Instructions: Simple signage and step-by-step guides make it easy for guests to understand the process.
Essential Equipment and Tools
Your s’more bar setup is only as good as the tools you have on hand. Here are the must-have items for a functional and guest-friendly station.
Heat Source Options
Without heat, there’s no gooey marshmallow magic. Your choice of heat source will depend on whether you’re indoors or outdoors.
- Campfire: Traditional and nostalgic but only feasible for outdoor events.
- Portable Fire Pit: Provides an authentic experience while still being portable.
- Tabletop S’more Kits: Great for indoor events. No smoke, no mess, and they’re much safer.
- Chafing Dishes & Gel Fuel Cans: Ideal for weddings or events with venue fire restrictions. Flameless and easy to use.
Roasting Tools
You can’t roast marshmallows without roasting sticks! But not all skewers are created equal.
- Bamboo Skewers: Inexpensive and disposable but prone to burning.
- Metal Roasting Sticks: Reusable, non-flammable, and often come with heat-resistant handles.
- Telescopic Sticks: Adjustable length means guests can stand farther from the heat.
How to Keep Roasting Sticks Clean and Organized
- Use jars or containers to store clean sticks upright.
- Provide a “used sticks” container so guests know where to discard them.
- For weddings or upscale events, personalized roasting sticks can double as party favors.
Pro Tip: Use small baskets or decorative jars for clean roasting sticks and clearly label them.
Safety Tips and Best Practices
Since fire is involved, it’s important to prioritize safety. This doesn’t mean you have to kill the fun, though. With these simple steps, your s’more bar will be safe for everyone.
Fire Safety Measures
- Fire Extinguishers and Water Buckets: Always have them nearby. No excuses!
- Keep Roasting Sticks Long: Metal sticks keep hands at a safe distance from the flame.
- Avoid Flammable Decor: No paper banners or fabric near the heat source.
Signage and Guest Instructions
- Place signs with simple instructions on how to roast marshmallows safely.
- Indicate which sticks are reusable and which are disposable.
- Use signs that remind kids to ask for adult help before roasting.
Pro Tip: Write out fire safety rules on a rustic chalkboard sign for a decorative yet useful display.
S’more Bar Display Ideas
It’s not just about safety and practicality — your s’more bar should also look amazing. Here’s how to create a display that will have guests snapping photos for Instagram.
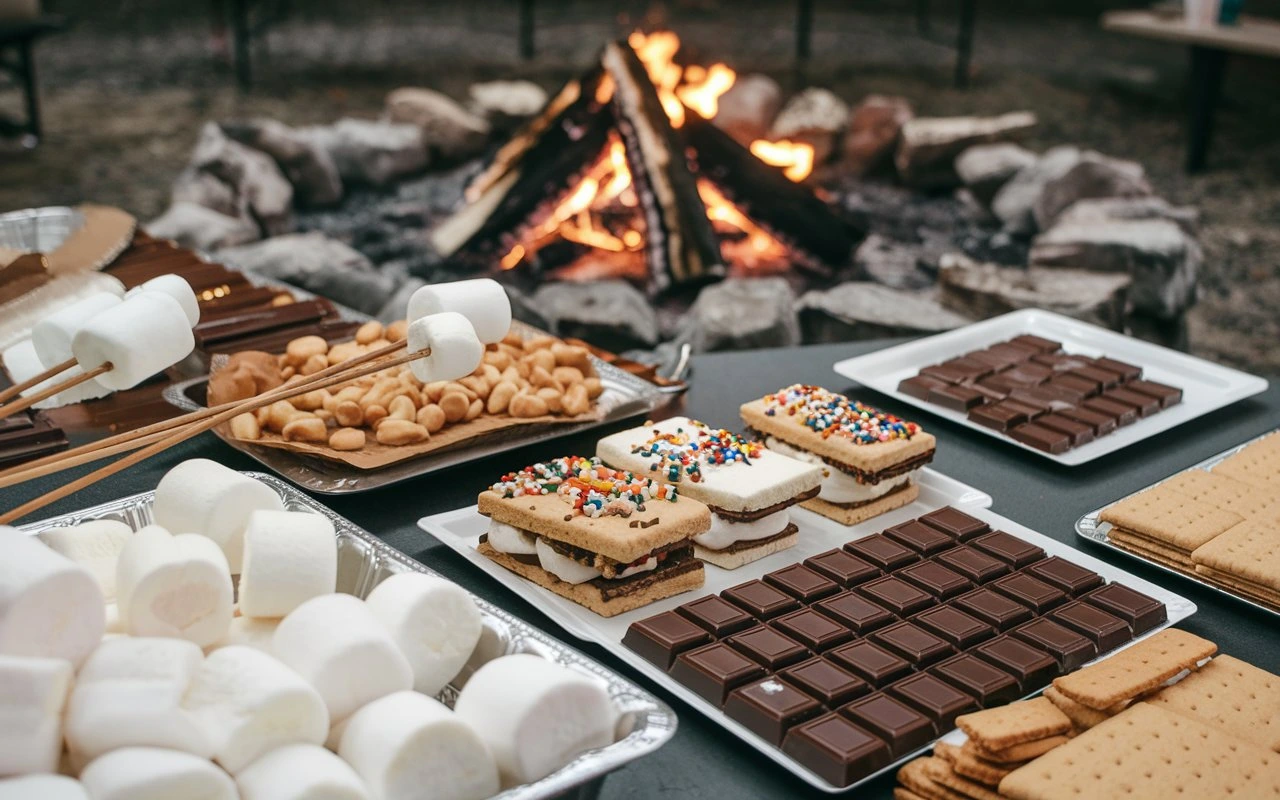
How to Arrange the S’more Bar
- Three-Zone Layout: Organize into three main zones—Ingredients, Roasting, and Toppings.
- Elevate Your Display: Use tiered serving trays, cake stands, or stackable boxes to add height.
- Label Everything: Use rustic chalkboard signs, mini clipboards, or printable labels for ingredients.
Themed Look Ideas
- Rustic Farmhouse: Use wood crates, mason jars, burlap, and greenery.
- Modern Wedding: All-white platters, clear jars, and elegant glass cloches.
- Kids’ Party: Bright colors, cartoon characters, and fun-shaped marshmallows.
Pro Tip: If you’re hosting a wedding or upscale party, rent wooden display stands or dessert carts for an upscale look.
S’more Bar Essentials
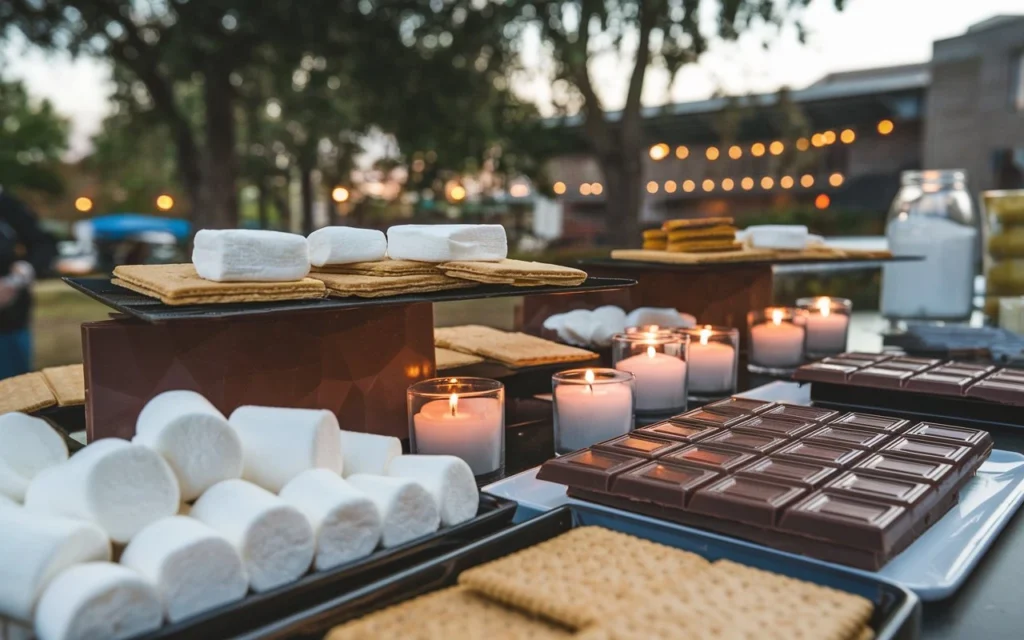
Once your s’more bar is set up, it’s time to stock it with the good stuff! From classic ingredients to gourmet toppings, these essentials will make your bar unforgettable.
Classic Ingredients for a S’more Bar
Marshmallows
No s’more bar is complete without marshmallows. But don’t just settle for basic white puffs. Offer variety!
- Classic Marshmallows: Sweet, fluffy, and iconic.
- Gourmet Flavors: Strawberry, vanilla bean, and chocolate-infused options.
- Allergy-Friendly: Vegan and sugar-free marshmallows for guests with dietary restrictions.
Chocolate
Chocolate takes s’mores to a whole new level. Include classic and gourmet options.
- Classic Bars: Milk chocolate, white chocolate, and dark chocolate squares.
- Gourmet Chocolates: Caramel-filled, mint-flavored, or peanut butter cups.
Graham Crackers
You can’t build a s’more without a solid base. While classic graham crackers are iconic, there are other options too.
- Traditional: Classic honey graham crackers.
- Specialty: Chocolate graham crackers, gluten-free crackers, and flavored cookie bases.
- Alternatives: Cookies, waffles, and pretzel crisps for unique textures and flavors.
Pro Tips for a Memorable S’more Bar
Take your DIY s’more bar to the next level with these pro tips. From keeping ingredients fresh to personalizing your setup, these ideas will ensure your bar is as fun and functional as it is delicious.
How to Keep Everything Fresh and Organized
Avoid stale crackers, sticky marshmallows, and melted chocolate with these storage tips.
Storage Tips for Key Ingredients
- Graham Crackers: Store in airtight containers or resealable bags to keep them crisp.
- Marshmallows: Prevent stickiness by storing them with powdered sugar in sealed jars.
- Chocolate: Keep cool using shaded areas or place small ice packs under the serving tray.
Make-Ahead S’more Kits
DIY s’more kits are a game-changer for parties and weddings. They save time, reduce crowding, and double as take-home favors.
How to Create DIY S’more Kits
- Use clear treat bags or small boxes.
- Add one graham cracker, one chocolate square, and two marshmallows.
- Seal it with a custom tag or personalized label.
How to Personalize Your S’more Bar
Customization makes your s’more bar unforgettable. Small details create a big impact.
Custom Ingredient Labels and Signage
- Label all ingredients using chalkboard signs, printable labels, or mini clipboards.
- Add a large welcome sign with a playful message like “Let’s Get Toasty!”
Personalized Roasting Sticks
- Buy reusable roasting sticks and label them with guests’ names.
- DIY option: Attach name tags to sticks using ribbon or twine.
Mistakes to Avoid When Setting Up a S’more Bar
Avoid these common missteps to keep your s’more bar experience smooth and stress-free.
Common Pitfalls and Quick Fixes
- Not Enough Ingredients: Buy 20% more than you think you’ll need.
- No Fire Safety Plan: Have a fire extinguisher or water bucket nearby.
- Poor Layout: Divide the bar into ingredient, roasting, and topping zones to reduce crowding.
- Roasting Stick Chaos: Provide labeled containers for clean and used sticks.
Frequently Asked Questions (FAQs)
What is the best way to set up a s’more bar?
Organize it into 3 zones: Ingredients, Roasting, and Toppings. Use tiered trays for height and clear signage to guide guests.
How do you keep chocolate from melting on a s’more bar?
Place small ice packs under the chocolate tray or use insulated serving dishes. Keep it shaded and only put out small batches.
What can I use instead of graham crackers for s’mores?
Swap graham crackers with:
Chocolate chip cookies
Rice cakes
Waffles
Pretzel crisps (for a salty twist)
Can I have a s’more bar indoors?
Yes! Use tabletop s’more makers or electric burners instead of open flames. Flameless gel fuel cans are another safe option.
How do I make a gluten-free s’more bar?
Swap classic ingredients with these vegan-friendly options:

